Your Cart is Empty

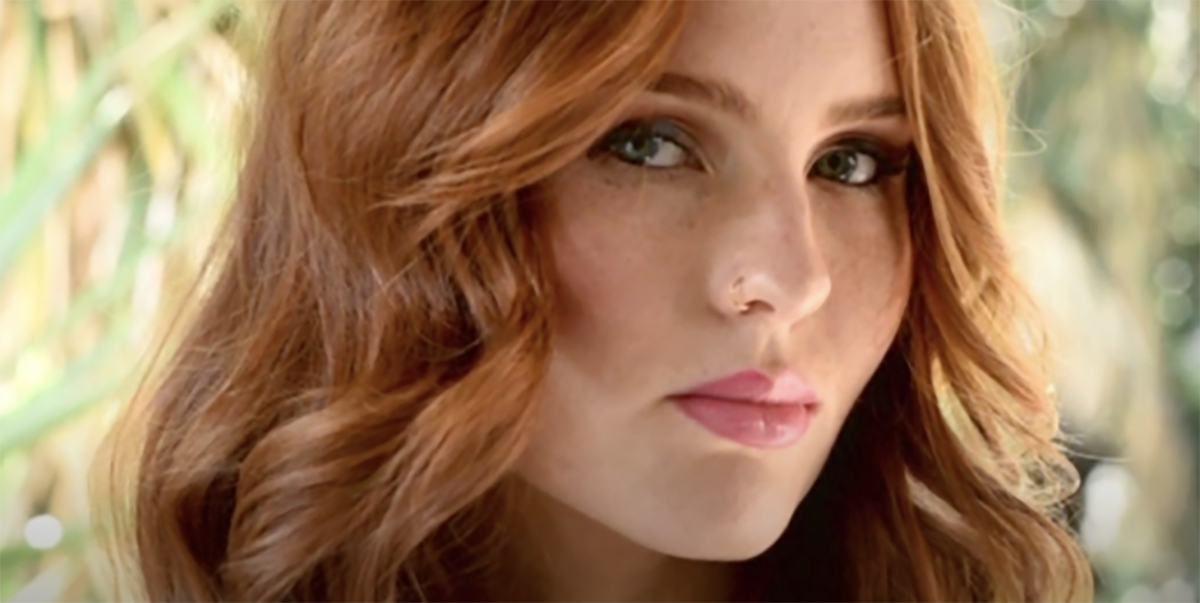
On Caitlin today we are creating a seamless long layered haircut. A few people associate this particular haircut with having a long fringe, curtain bangs, and/or shaping around the face. Here are some short snippets on how we achieve this commercial, everyday yet stylish fashionable look in the salon.
First off we start by framing the face using a forward graduation technique to the desired shorter length. The forward graduation technique involves pulling the hair forward and cutting from longer to shorter. Also the higher the elevation in combing the hair forward will determine how the hair will fall. I usually start with one side of the head, assessing the overall length and softness of the fall which is totally up to up to your guest as to how they want their hair to sit. Also keep in mind suitability of length around certain face shapes. The reason behind that is that with each haircut you then know which features of the face to enhance and which features to disguise.Follow through onto the other side in the same techniques and check for balance to keep both sides looking equal and the same/similar. This can be achieved but either shallow point cut or blunt cut depending on the hair type and what is your guest preferred look that they want to achieve.
Once completed the face framing I then move onto the shortest front layer which I then elevate all the hair to the center part and cut on a 45 degree angle at 90 degree elevation. This creates the long layers as there will not be much to cut off as you reach the back. Keep in mind to bring hair up to the stationary guide in the middle.
If you're a little confused on the word elevation in this step, Elevation is a term that best describes the ‘picking up and combing the hair’ upwards and or downwards no matter the direction you take the hair in, where in the case we are taking the hair horizontally ‘upwards’.
Testimonial
To create this haircut was the ever so popular Matsui Matte Black Aichei Mountain Triple set. These shears allow me to have complete control and confidence when cutting and creating new and old haircuts like the one featured here. With the offset handle I find it gives me complete comfort and allows me to drop my shoulder a little without compromising the haircut in anyway, also allows me to not get into any awkward or uncomfortable positions when cutting my clients hair that can lead to long term discomfort or injuries in the future if I were to use the wrong type of scissor for me. Speaking of key comfort - the fact the finger rest is permanently attached to the handle of the shears ensures I never have to worry about losing the finger rest or it falling/unscrewing without my knowing.
I used the 5.5 inch shear to cut my baseline and the shaping around the face as I feel I have more control cutting straight lines with a smaller shear. For the layering, chipping in, and point cutting into the layers I used my 6inch shear, giving me complete control with the length of the blade when making my fast opening and closing motion of the shears. My thinners were then used to remove any bulk or heaviness I saw once the haircut was complete and dry/styled. In my set I also have a razor that was included and lucky for that because even though I did the shaping with my 5.5 inch shear, I then touch up with my razor to give the shaping of the face and more lighter and feathered finished look. These shears come in a range of colours but the choice was obvious for me, a timeless matte black to keep things stylish in the salon for me.

I then blow dry the hair so it’s smooth and easy for me to see where I need to add final touch ups to the cut. Once smoothed out I start personalising the cut using a combination of deep parallel point cutting and slicing. Point cutting can do two things, gives hair texture and also helps remove unwanted weight. When you slice into the hair you can go in deeper to remove excess weight. However, I only use this technique if the guest hair needs it and/or requires more movement.
I then prepped the hair with heat styling and hold products to ensure the hair is protected and will hold the final style for hours/days after today. I then tonged all of the hair forward to the face creating curls. Once all hair is cooled I used a soft bristle flat brush to smooth hair back away from the face and create a wave, as opposed to curls. We want the hair to be completely cooled before brushing because if you haven’t given the hair a chance to cool and reform, The bonds of the hair that was straight/smooth are then broken by the heat that you created with the tongs for the hair to go into a curl. You then need to allow it to cool so the bonds can reform and essentially set the hair into its new curl. Keeping that in mind, once cooled don’t be afraid to really brush the curls out as this will give you a more natural look, and create aeration and body. If the hair is well primed with correct styling products it will handle the brushing and will have longevity in its style.
So with the finished look I ran a light smoothing serum to the hair to create more shine. This cut is very versatile as it can look great on any length hair. This cut will never go out of fashion as it’s a look that most people can pull off and is also super easy to style for your everyday wear or your night out locks. I hope you like it, and I will see you next time.